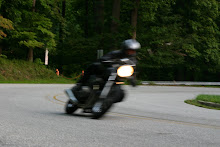
For many people painting can be an intimidating process. Some never even think about painting their own stuff (motorcycles) because it is hard and can turn out really bad if done improperly, sort of. However, the paint on your bike can make it our break it, so if you are looking at used bikes and know how to paint, then you can save money.
(photo taken from bikeexif.com)
Painting really isn't super hard, or atleast spraying on a color or two or three and making it look nice isn't that hard. You also do not need a clean room, air compressor with a spray gun, and a power sander to paint your bike parts.
The absolute first step to painting your bike is figuring out what color(s) you want to make it and if you can actually pull it off. Single and dual paint schemes are very popular and at the beginner level fairly easy. The project that this article is based on is going to be white, with a blue racing stripe with a sparkling clear coat.
You know what colors you want, now it is time for preperation. Generally, you can paint the side covers of the bike first. This way you can still ride the bike if you do not have enough time after work or whatever to finish and you can see how it is going to turn out without ruining your tank and everything else. Preperation is the most important step in painting. To have extremely nice results you have to prepare extremely well.

Sanding sponges are idealy the best tools for preparation. You are not doing a proffesional paint job for a $100,000 show bike so it is not necessary to remove all the the paint down the the bare metal. Since I mentioned side covers we can use them as an example. Remove the side covers... duh. Take a rag and wipe them off, you can clean them with soap and water if you want, but again unless it is covered in leaves, oil, and cat fur you can probably get away with just dusting it off. Inspect the surface and make sure that you are happy with it. If so, it is recommended to scuff the surface before applying any paint, as it will adhere to the surface better. Use some 1000 grit or 800 grit or something like that. Wipe off the dust.
Side covers generally do not need alot of prep work to have good results as they are mainly plastic. If there is a big dent or crack, we will go over body filler/putty in a later section.
After a light scuffing, get out your sandable primer. There are three basic primer colors:white, gray, and black. The color of the primer effects or affects (I forget which one) the overall tone of the paint. A white primer will make the paint brighter, a black primer will make it darker, and a gray one will do something in the middle.
Make sure the tempature is around 60 degrees or above so the primer can cure. If the surface is clean and sanded you are ready to go! Shake the can...duh. Do 2-3 light coats as opposed to one heavy one. This will ensure that you have a smooth, crisp, and clean coat of primer without bloches and runs. Hold the can about 8 inches away from the surface and go parallel back and forth from end to end. Do not worry if it is not compeltely the primeres color on the first coat!
Keep checking for the next part of the rattle can art. It will involve using body putty with more intensive sanding techniques. Also check out the next "history of bikes" article that SHOULD be coming out this week. Oh yea, also look for an upcoming riding destinations article, and riding with a passanger! See ya next time.

No comments:
Post a Comment